Sunday 25 October 2015

Pumpkin heads

I thought I would embrace the Halloween season and knit with pumpkin coloured yarn!

Of course that also lends very nicely to pumpkin hats ...


 The one above is a crochet one that I made up myself as I went along.  I'd already made two knitted pumpkin hats (you can see one below) and I thought it must be fairly simple to crochet one too. 
It has come up quite small - baby size - and is dead cute!


This one above is made from Stylecraft yarn - I love the softness of this yarn!
 
 
|I decided to make some mittens to match!
 

Aren't they sweet?!!
 
I then thought I'd try an adult hat. 
I found a pattern which I thought looked quite pumpkin-like with the rib pattern going down regularly round the hat.  I was undecided whether to add green at the top for the leaves and stalk.  Eventually decided against it! 
 
 
Here is my trusty model!
 
It fits his head nicely but also is a good fit for my adult sized head too. 


It is nice and stretchy and slouchy too!
 

Doesn't he look cheeky?!
 
Finally decided to use the same yarn as the above hat (Rowan dk cotton)
to make some fingerless gloves.
 
 
This is such a pretty pattern.

 
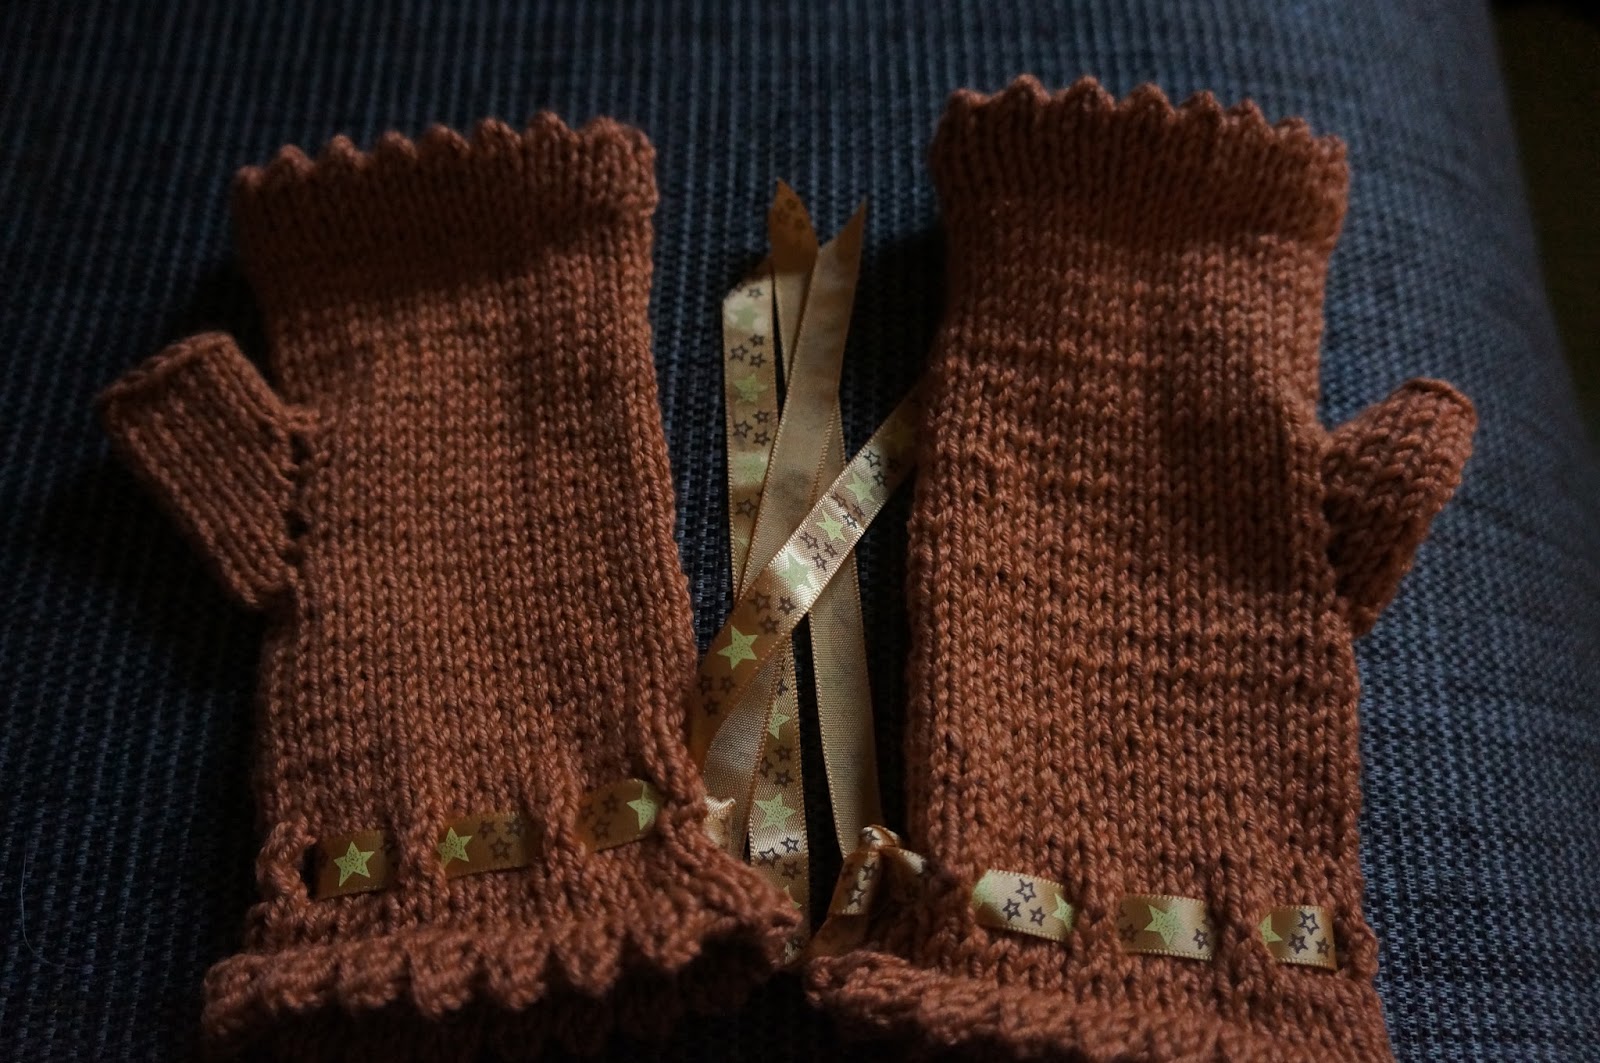
It is from the book Simple Knitting by Ros Badger and they are called Fingerless Cotton Gloves (says what is does on the tin!)
 
 
I think they are rather pretty and Victorian looking.
 
So I have gone rather mad making lots of pumpkin coloured things and am now knitting myself a lovely pair of fingerless gloves in "my" shades - I'll show you soon! 
 
***** 0*0*0 *****
 
It fits him but also fits my head as it is lovely and stretch and slkslouchy.

Wednesday 14 October 2015

Alas poor Yorrick

Oooo Hallowe'en is nearly here ....
 
and I have made a few bits to go into The Crafty Phoenix Lady unit at The Emporium   https://www.facebook.com/yeovilemporium?fref=ts


A little while ago I found a pin on that Bermuda Triangle place know as Pinterest.
 
It lead me to 2 Mile Creek Primitives at Etsy
to the above pattern in two styles of skull.
 
There were many more great patterns that I may go back for at a later date.
 
Anyway ... I made 9 skulls ....
 
 
I had a ball making them.  It was so much fun making the fabric look old and worn; and then going made with the teeth, and choosing buttons for their eyes or should I say sockets?!!
 

What do you think?


~~~~~ oooOOOO OOOOooo ~~~~


Monday 5 October 2015

comMISSION completed .... at last!

Do you remember the blue stars I was piecing together a little while ago? 
The two bags that I'd been commissioned to make.

Well I have .... at long last ... finished them! 

 
So many things have happened to delay these bags being finished.  Family stuff; broken sewing machine; illnesses; lost cutter .... you wouldn't believe it!


BUT finally they are both finished and have been given to Noah's Mummy,
ready for when he starts Nursery.
 

This is the PE style bag that have a drawstring top - ideal for PE kits; swimming gear; trainers ...


The bigger bag I wanted to make roomy enough to fit everything and the kitchen sink in. 
 I wanted to make pockets so items like wipes and bottles could be placed in separate pockets.
 

And I wanted to continue the bright stars theme into the pockets - so the grey pocket edges were bound with bright yellow fabric with equally bright coloured stars on. 
The lining of the bag was bright yellow!

 
I quilted the main bag as I wanted it to be sturdy yet soft.
So after appliqueing on Noah's name and rocket ships I quilted "in the ditch" of the squares.
 

The handles I made with one of the patchwork squares fabric with stars, moons and suns on. 
I brought the red from Noah's name into the stitching down the sides - and these too were padded to make them more comfortable.

I also made them long enough for Mummy to have over her shoulder or on the handles of the buggy.

 
The base had to be sturdy too - so that it would sit nicely if placed on the floor. 
It also meant it would be easier to pack and to find things.

 
The base was an elongated oval shape.
 
 
I wanted the bag to be rounded and not angular so making the ends slightly curved worked.
 
 
Lots of stitching to hold it in place!
 
 
See how many pockets it has!  And how bright!

 
Oh and a little bit of Homer in the photo too (above). 
He thought I'd gone out to play - not take photos!


I don't think Noah will have any problem finding his bag!  I also think with his name on these and on his bunting he's going to learn his name very quickly.

 
What made this commission even greater is that I finally got to meet Noah and his Mummy! 
 They came into The Emporium on Thursday morning and collected their bags.
 
It was so nice to be able to put a face to the name and to meet the absolutely gorgeous Noah
(he has the biggest brown eyes ever!)
 
AND they liked the bags!
 
Result!
 
~~~ *** ~~~